Import CAD
This feature has restricted rights. You must have an Studio Licence Profile to access to the 3D Library and have the 3D Importer or Workspace Owner Role. Please see the User Rights Management policy page if you need more information.
How do I import CAD File?
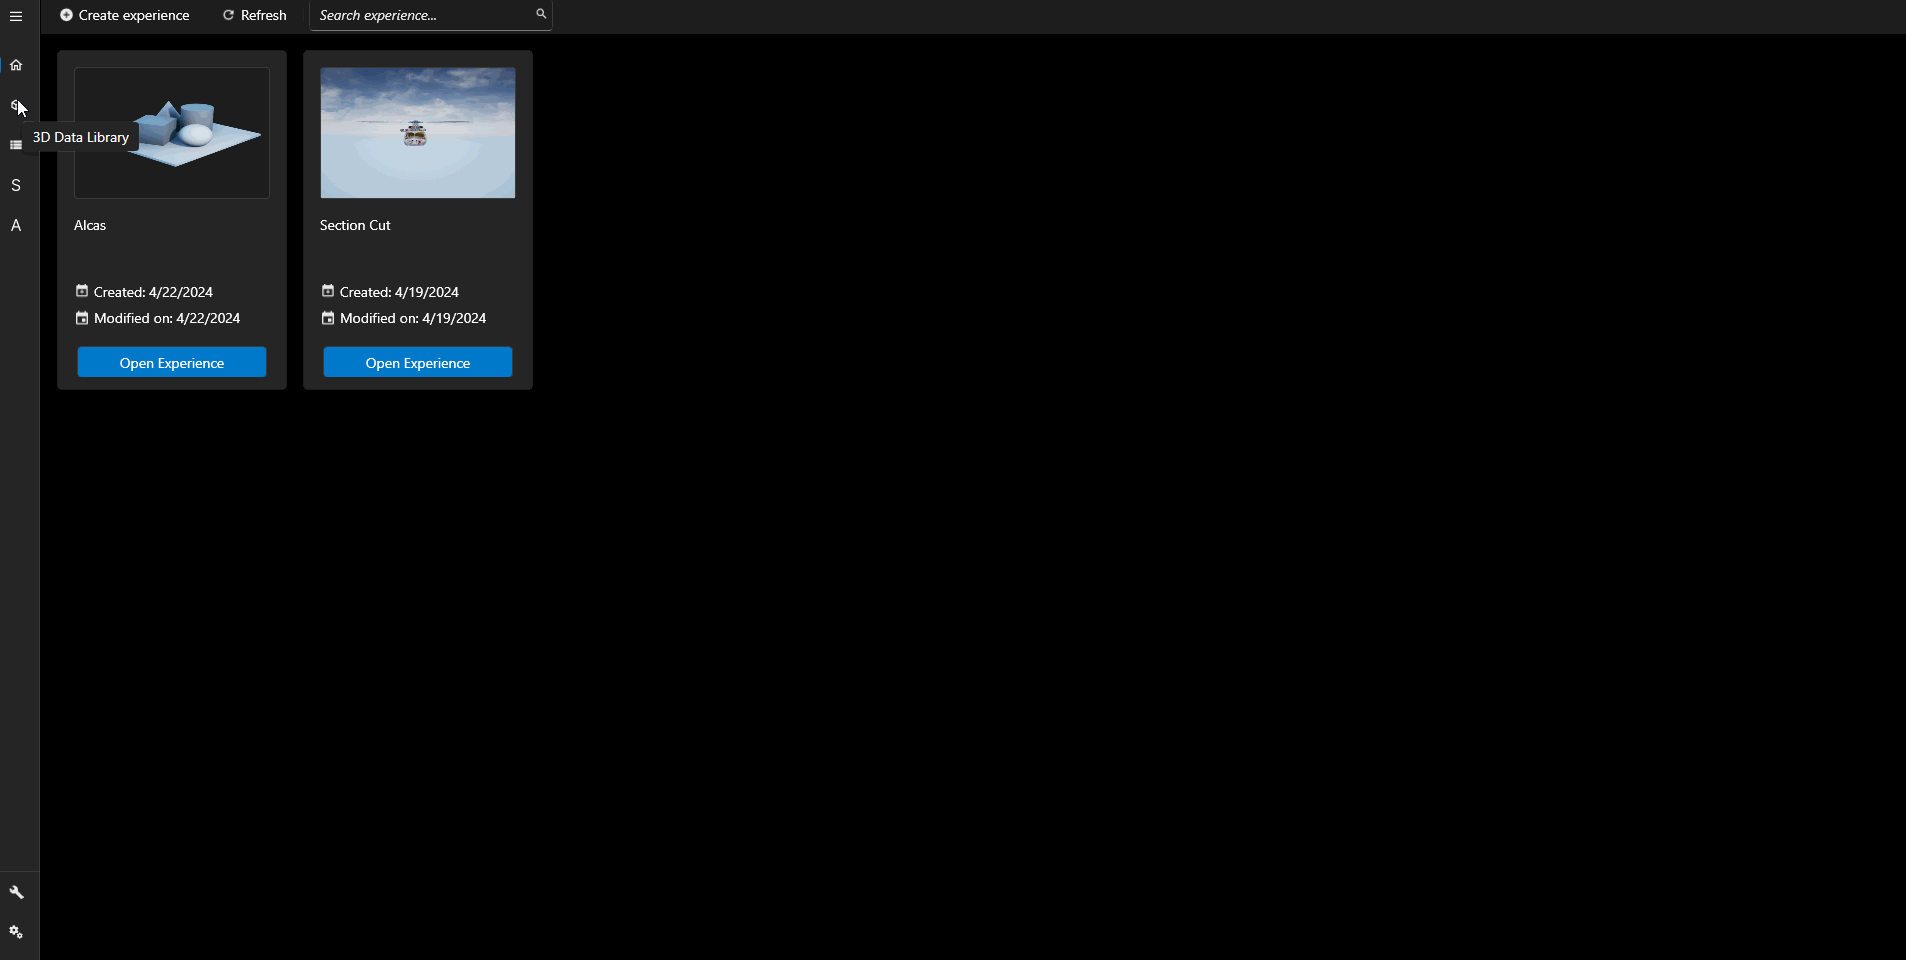
In the 3D Data Library you can import CAD file from all kind of format.
- Step 0: go in the 3D Data Library.
- Step 1: click on the Import CAD button. This will open the import pop-up.
- Step 2: select your CAD file or drag and drop it in the dedicated zone.
- Step 3: set your import settings.
- Step 4: click on the Start Uploading button.
Depending on the size of your CAD this operation might take some time. This operation will automatically launch 2 background task: parts import and parts preparation (learn more about 3D Data Status. Once you imported your CAD you can see it in the 3D Viewer. When you imported a CAD, you are automatically designated as its Owner.
To ensure that your CAD will be correctly imported, please do not close the programm will the import is running.
Import Settings
When you import your CAD you can set several settings.
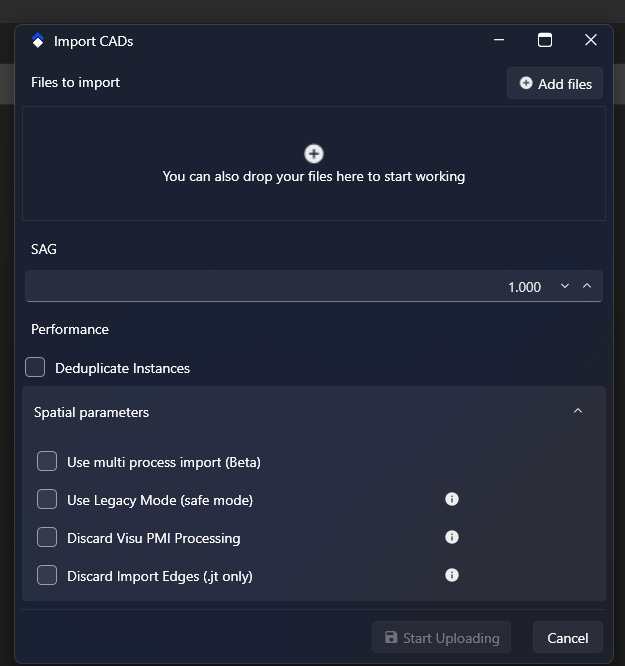
- SAG
- Deduplicate Instances: this option deletes deduplicated instances (same parts at the same place).
- Use multi process import: this option is spatial import parallelization. It is still a beta feature, it might lower your performances.
- Use Legacy Mode: this option matches SkyPrep settings to improve stability. It might result in slower performances and it disable all other options. We recommand you to try this option if the import didn't work with the other options.
- Discard Visu PMI Processing: This option discard product manufacturing information if existing (faster especially for CATIA V5). We recommand you to activate it.
- Discard Import Edges (.jt only): This option discard Visualization data for edges, improves performances (JT and JT Direct only). We recommand you to activate it.
How can I see my CAD in 3D?
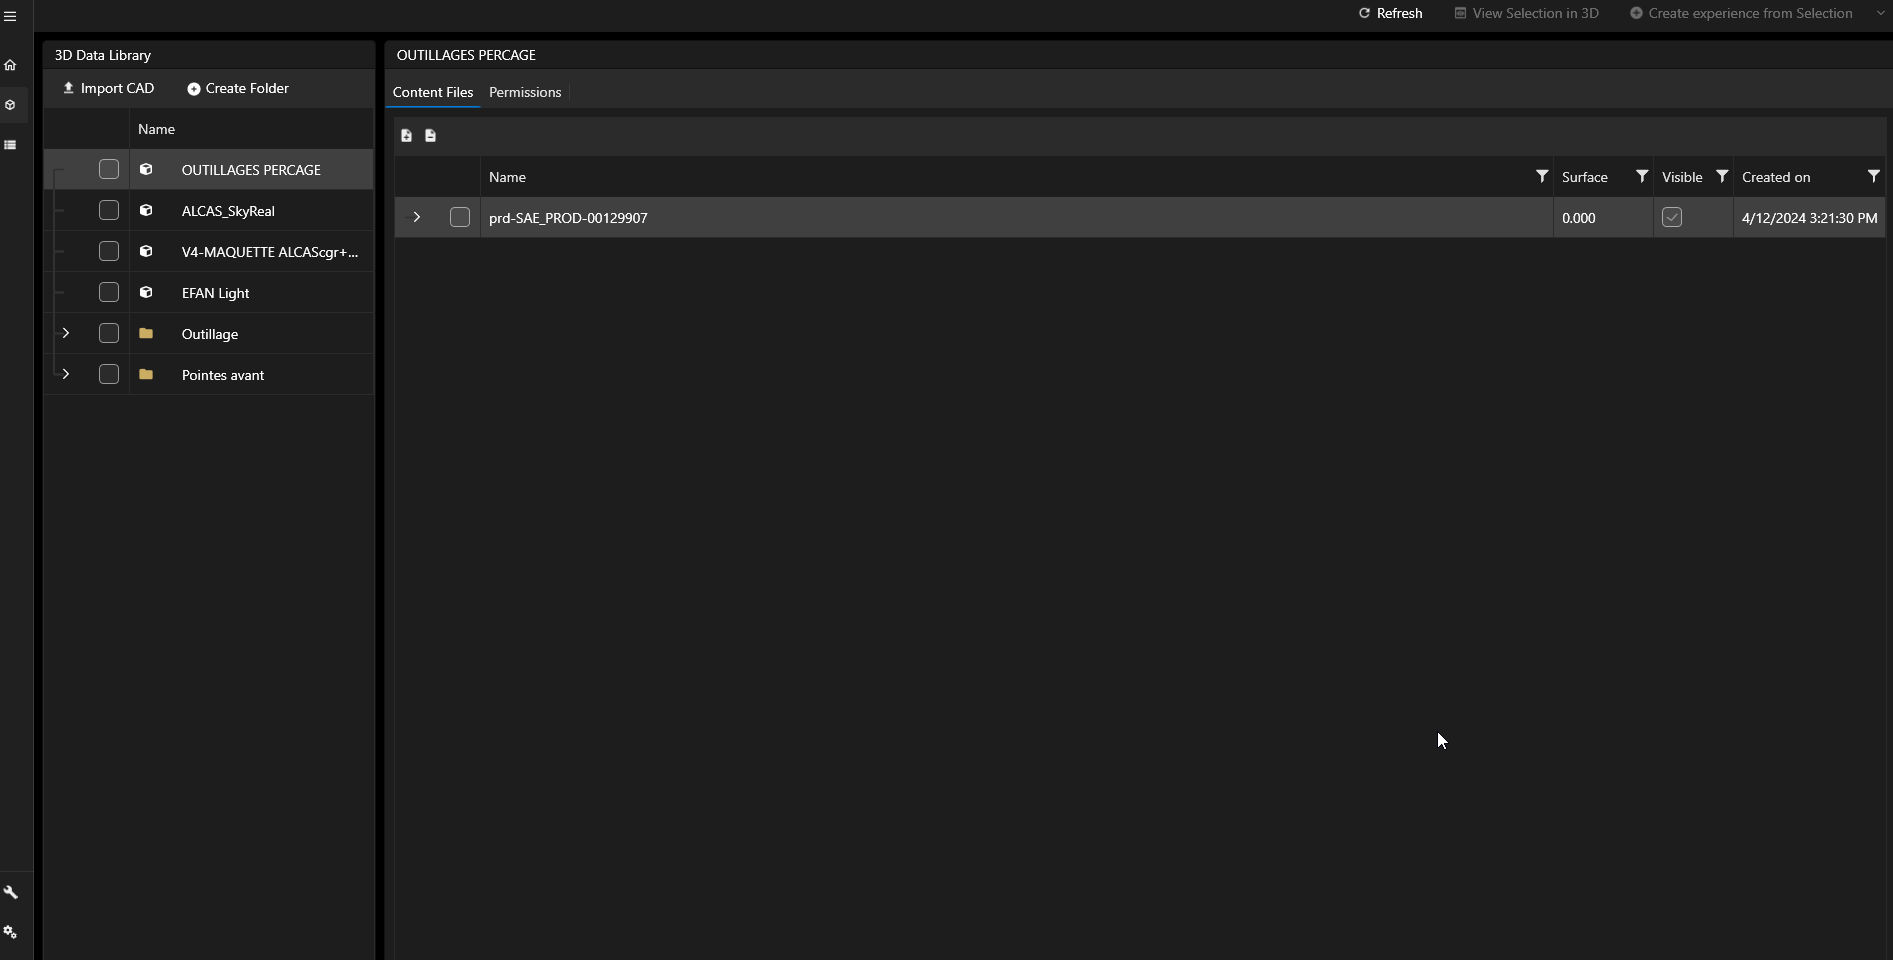
- Step 1: select your CAD by checking the checkbox, you can rather select the full CAD or only CAD subpart. You can also select parts from different CAD file.
- Step 2: click on the View Selection in 3D button on the top of your screen.
My import didn't work, what can I do?
- Check your installation: you must have your Deck version matching your XR Center version and matching your Prep Agent version.
- Check the log in your XR Center Client App: enter your XR Center address in your browser, login, and go into the diagnostic page to see your error.