Getting started with Unreal Engine 4
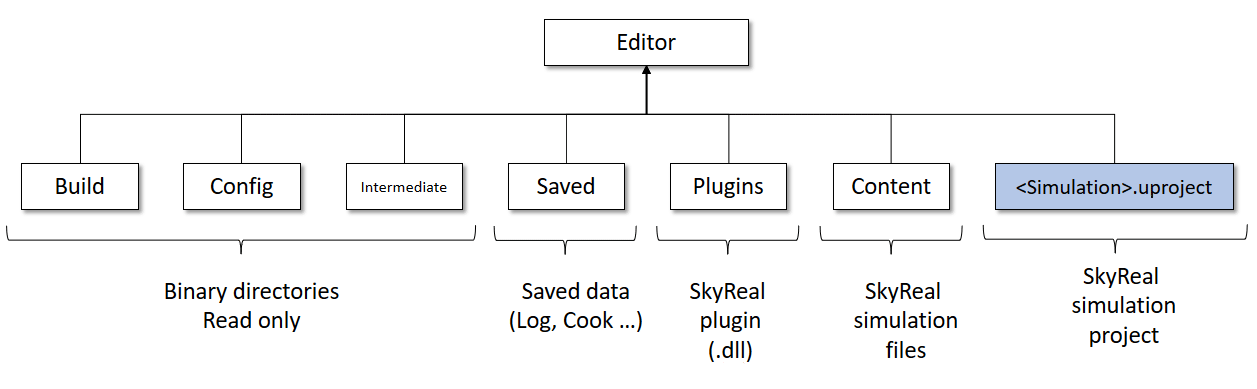
Unreal Engine root directory
Interface
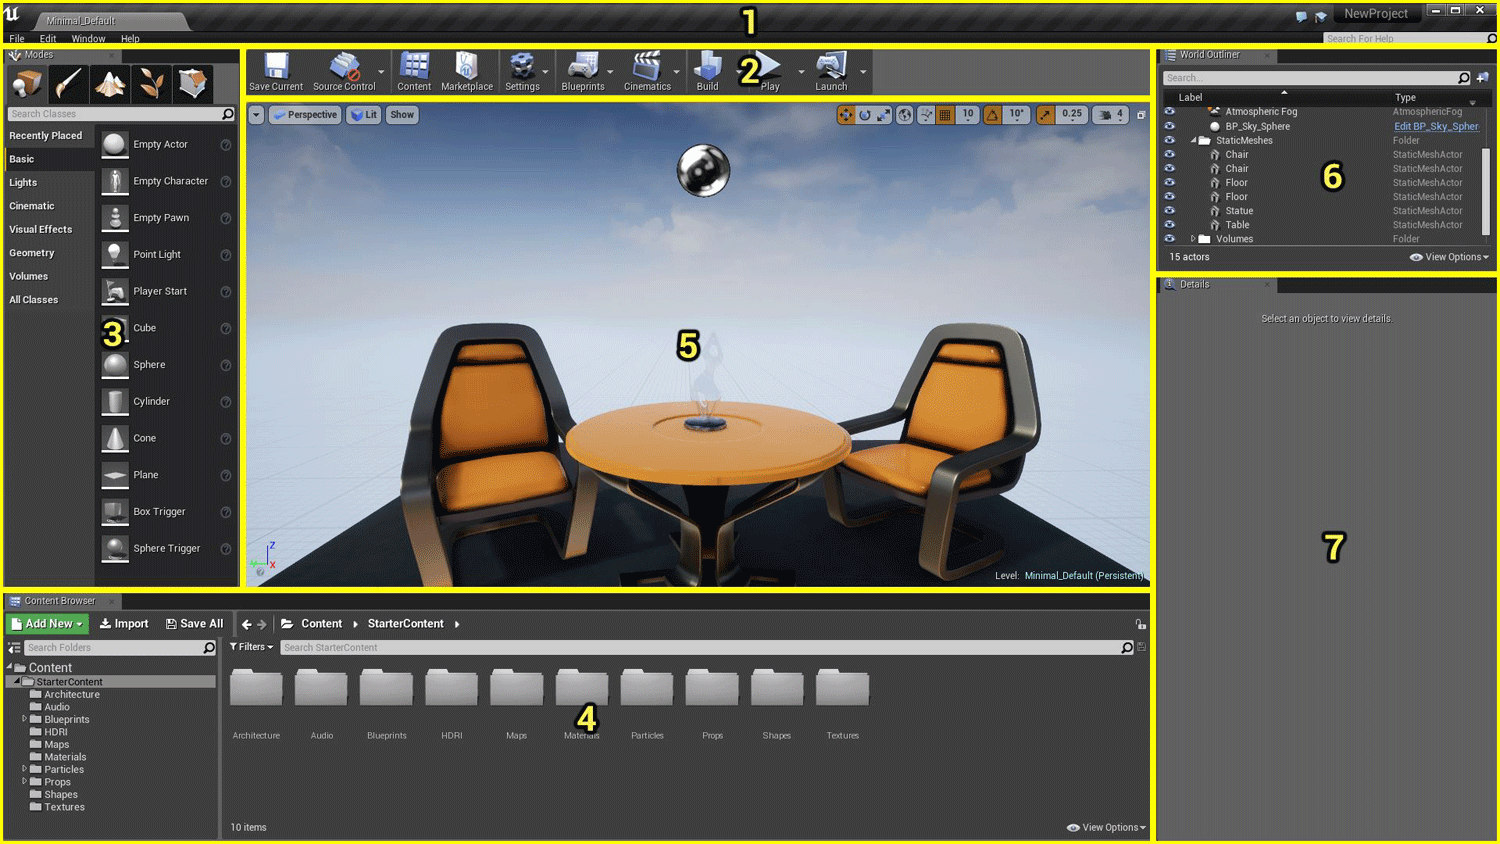
1. Tab Bar and Menu Bar
The Level Editor has a tab along the top providing the name of the current level. Tabs from other editor windows may be docked alongside this tab for quick and easy navigation, similar to a web browser.
The Menu Bar in editor should be familiar to anyone who has used Windows applications previously. It provides access to general tools and commands that are used when working with levels in the editor.
See the Menu Bar page for descriptions of each menu and its contents.
2. Toolbar
The Toolbar panel, like in most applications, is a group of commands providing quick access to commonly used tools and operations.
See the Toolbar page for descriptions of each of the items on the Toolbar.
3. Modes
The Modes panel contains a selection of various tool modes for the Editor. These change the primary behavior of the Level Editor for a specialized task, such as placing new assets into the world, creating geometry brushes and volumes, painting on meshes, generating foliage, and sculpting landscapes.
4. Content browser
The content browser panel is a file explorer of the current project. It’s used to sort, create, rename and delete assets.
5. Viewport
The Viewport panel is your window into the worlds you create in Unreal. This panel contains a set of viewports, each of which can be maximized to fill the entire panel and offer the ability to display the world from one of three orthographic views (Top, Side, Front) or a perspective view giving you complete control over what you see as well as how you see it.
See Viewports for more information on working with viewports.
6. World Outliner
The World Outliner panel displays all of the Actors within the scene in a hierarchical tree view. Actors can be selected and modified directly from the World Outliner. You can also use the Info drop down menu to turn on an extra column that shows Levels, Layers, or ID Names. See the World Outliner page for details on using the World Outliner.
7. Details
The Details panel contains information, utilities, and functions specific to the current selection in the viewport. It contains transform edit boxes for moving, rotating, and scaling Actors, displays all of the editable properties for the selected Actors, and provides quick access to additional editing functionality depending on the type of Actor(s) selected in the viewport. For instance, selected Actors can be exported to FBX and converted to another compatible type. The Selection Details also allows you to view the materials used by the selected Actors, if any, and quickly open them for editing.
See the Details page for a more complete overview and guide to using the Details panel in the Level Editor.
Start using UE4 for Skyreal VR
In order to enhance the Skyreal VR project, prepare your CAD using SkyPrep and select the "editor" option in the output choices.
When the preparation is done, open the .uproject file located in the [SkyPrepOutputDirectory]\[ProductName]\Skyreal VR\editor folder.
Important information
1. Working directory
Due to some Skyreal VR limitation, it’s important that all of the assets loaded in the map are located in the simulation directory. Otherwise, the assets will not be loaded inside Skyreal VR and can cause crashes in few cases.
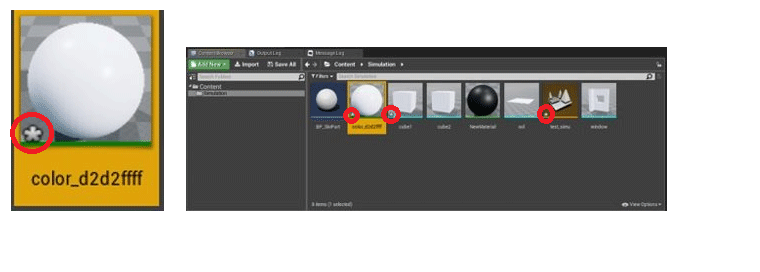
2. Save your work
When an asset has a star *, it means that it hasn’t been saved. To do so, you can either:
- Select it, and press
Ctrl + S - Save every assets of the simulation by pressing
Ctrl + Shift + S